Our Blog
Stay up to date with the latest news, benchmarks, and insights about enterprise AI deployment.
General
Benchmarking Llama 3.1 405B on 8 x AMD MI300X
January 18, 2025Read more

General
Benchmarking Llama 3.1 70B on 1 x AMD MI300X
January 17, 2025Read more
General
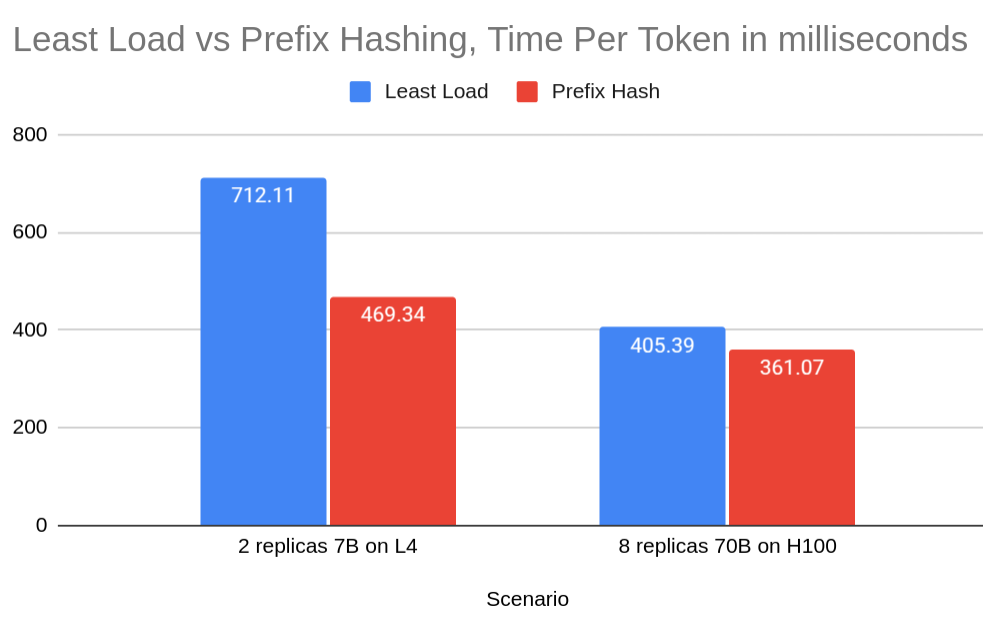
Improving LLM Serving Performance by 34% with Prefix Cache aware load balancing
January 10, 2025Read more

General
Benchmarking 70B model on 8 x L4 GPUs vLLM: Pipeline vs Tensor Parallelism
November 5, 2024Read more

General
Benchmarking Llama 3.1 70B on NVIDIA GH200 vLLM
November 3, 2024Read more
General
Deploying Llama 3.1 8B on TPU V5 Lite (V5e-4) using vLLM and GKE
October 12, 2024Read more
General
Deploying Llama 3.2 Vision 11B on GKE Autopilot with 1 x L4 GPU
October 11, 2024Read more

General
Deploying Llama 3.1 405B on GKE Autopilot with 8 x A100 80GB
October 4, 2024Read more
General
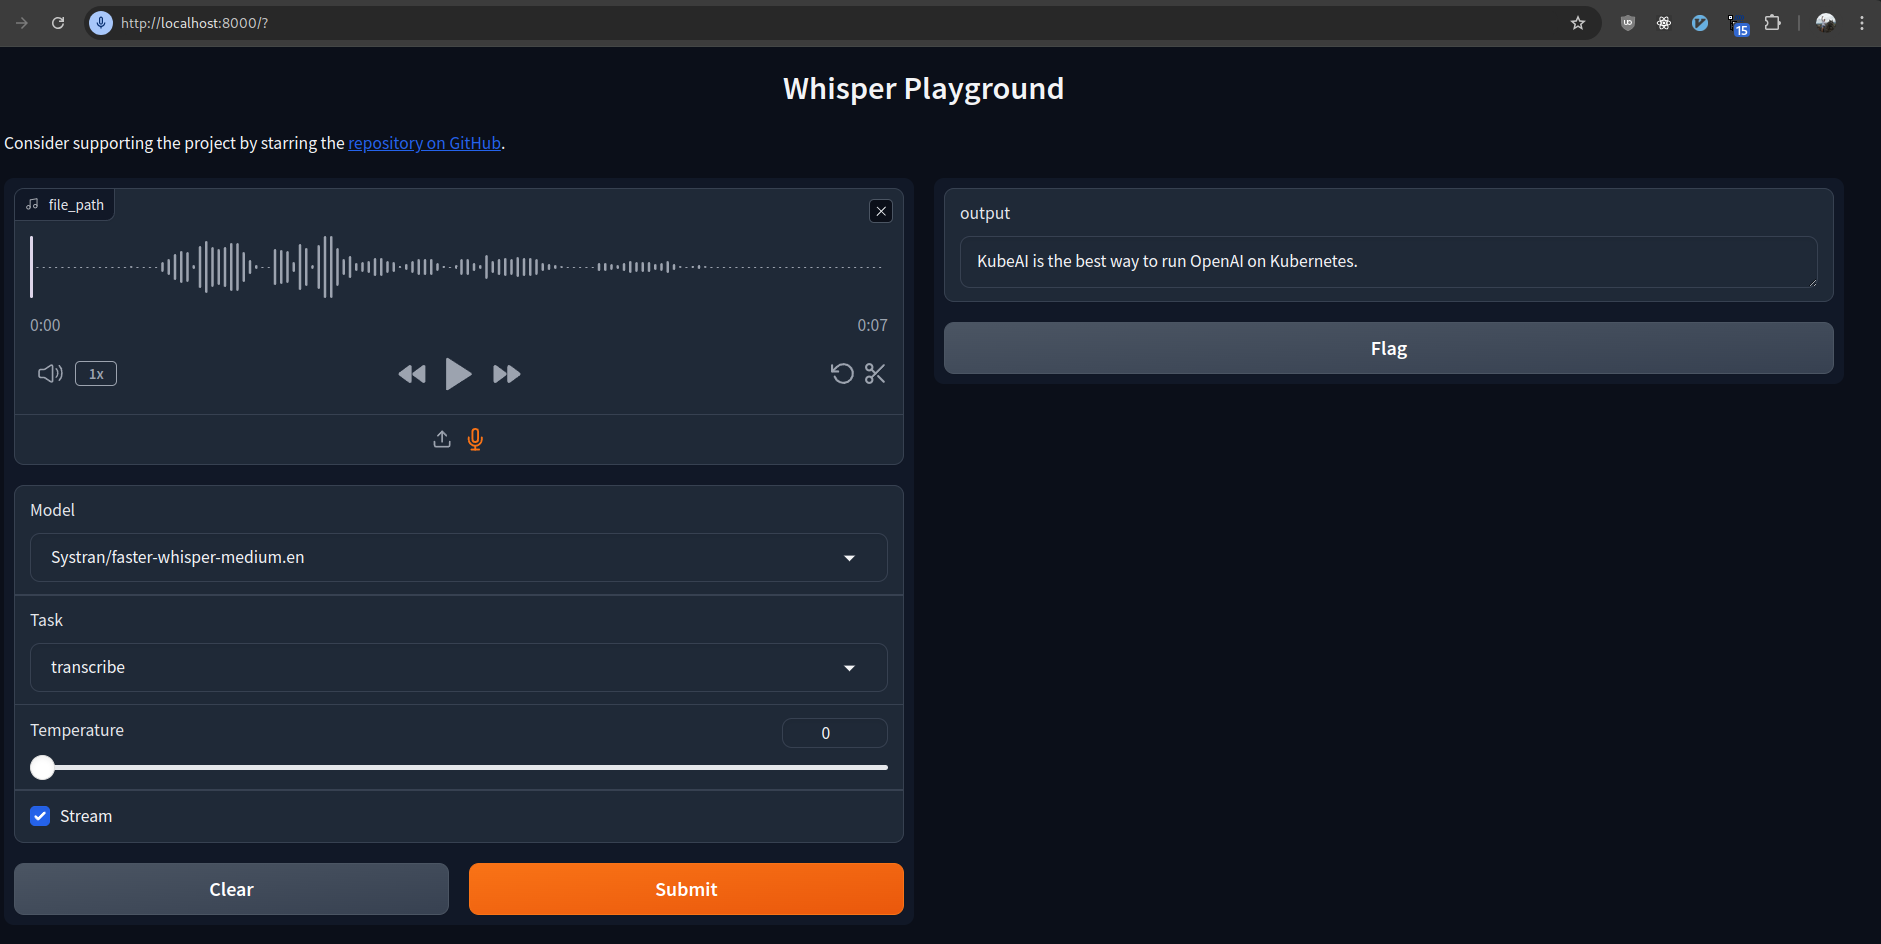
Deploying Faster Whisper on Kubernetes
September 2, 2024Read more
General
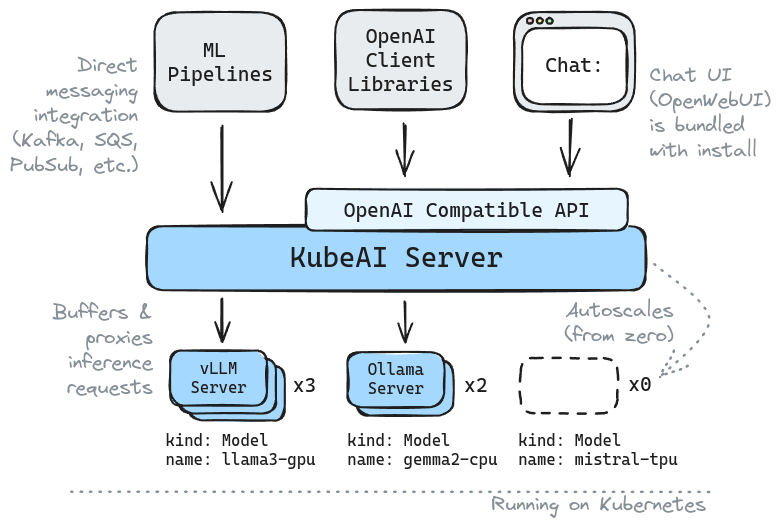
Introducing KubeAI: Open AI on Kubernetes
August 25, 2024Read more
General
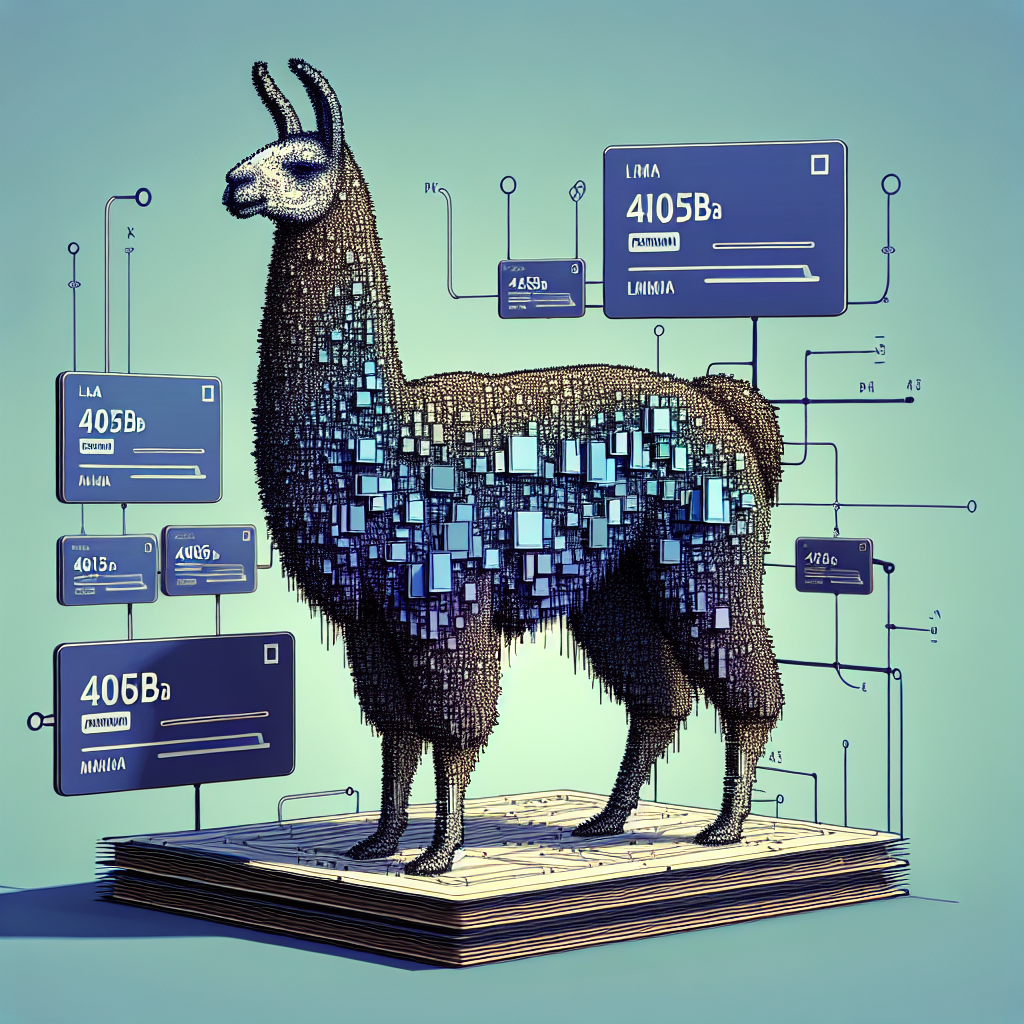
What GPUs can run Llama 3.1 405B?
August 8, 2024Read more

General
Learn how to benchmark vLLM to optimize for speed
August 4, 2024Read more
General
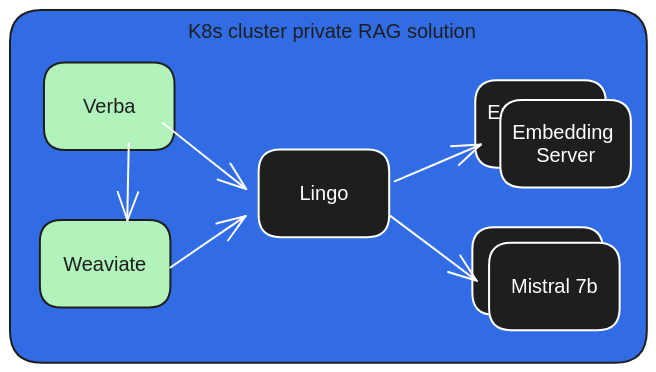
Private RAG with Lingo, Verba and Weaviate
May 8, 2024Read more
General
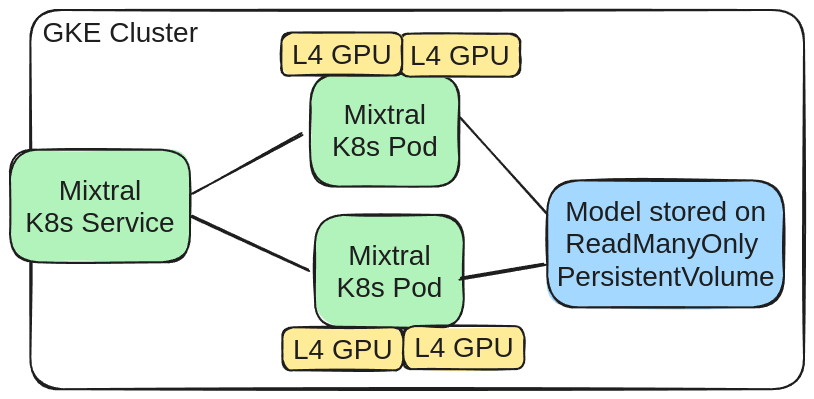
Deploying Mixtral on GKE with 2 x L4 GPUs
February 10, 2024Read more
General
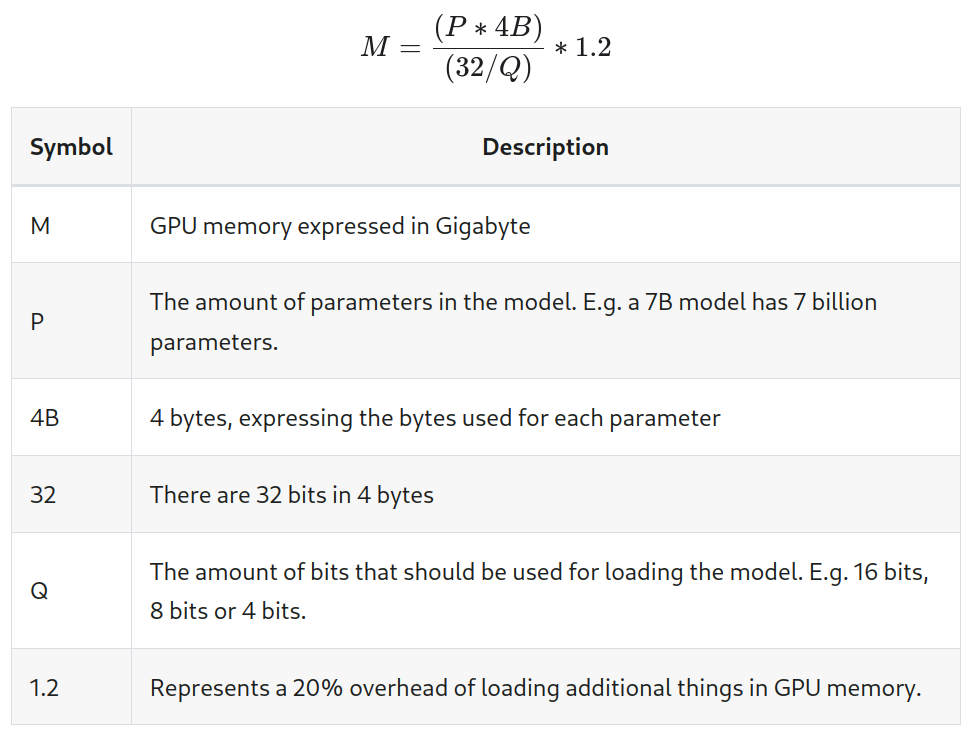
Calculating GPU memory for serving LLMs
November 16, 2023Read more
General
Deploying Mistral 7B Instruct on K8s using TGI
October 21, 2023Read more

General
The K8s YAML dataset
October 9, 2023Read more

General
Tutorial: K8s Kind with GPUs
September 7, 2023Read more

General
Converting HuggingFace Models to GGUF/GGML
August 31, 2023Read more

General
A Kind Local Llama on K8s
August 25, 2023Read more
General
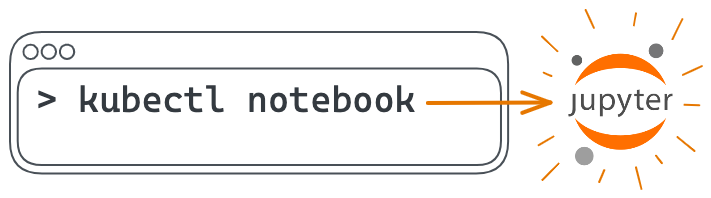
Introducing: kubectl notebook
August 22, 2023Read more

General
Tutorial: Llama2 70b serving on GKE
August 6, 2023Read more